android项目搭建手册
阎道成 2022/2/7 java
# 一,搭建项目
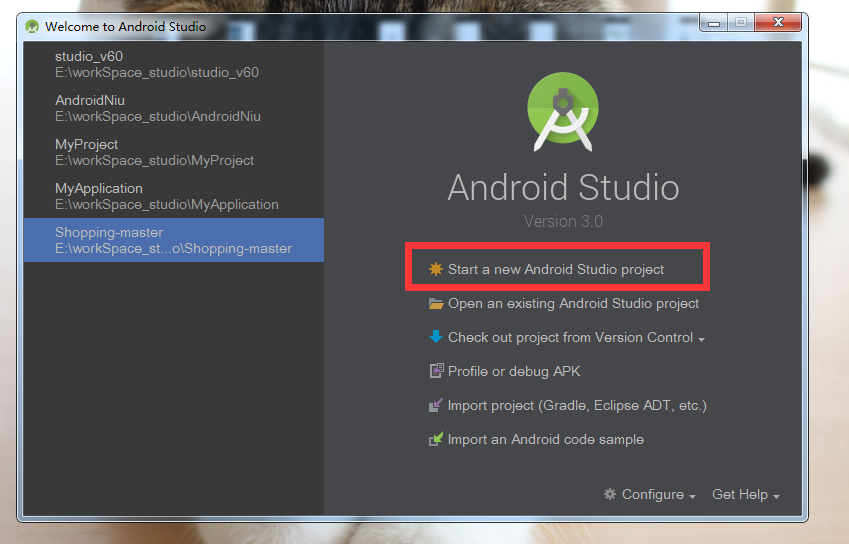
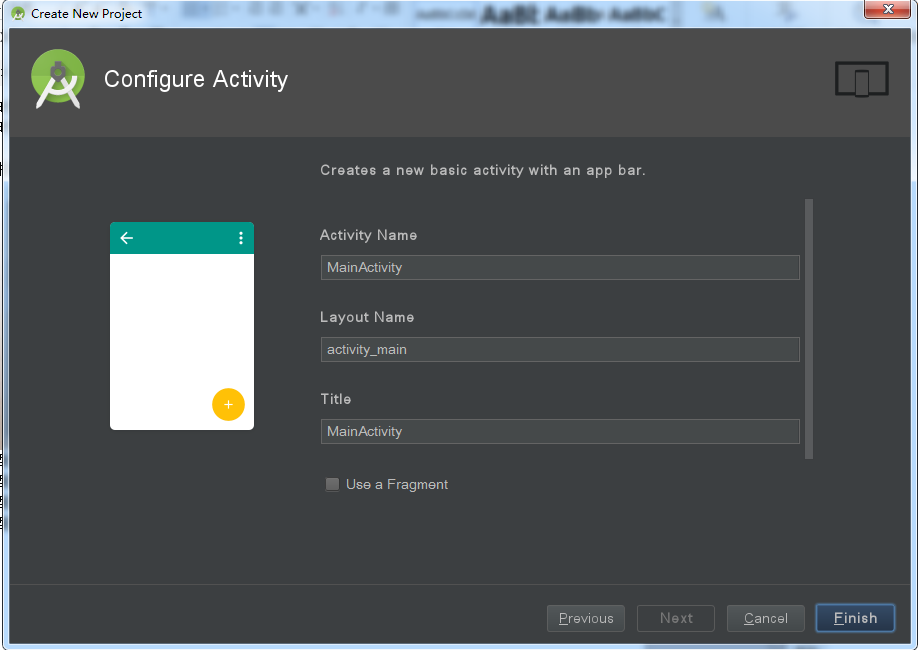
# 选择上图所示,下一步->下一步->选择空白页面->点击下图finish。
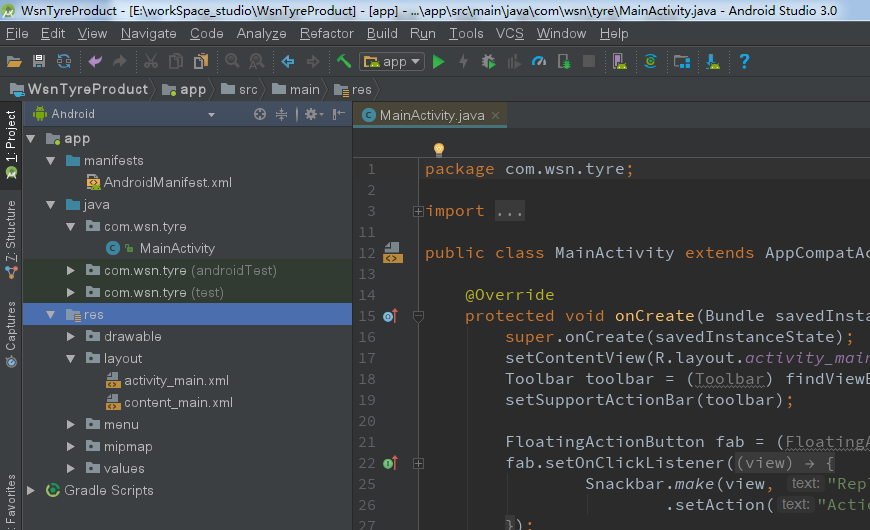
# 项目创建成功,成功后如下图所示。
注意项:三方库配置
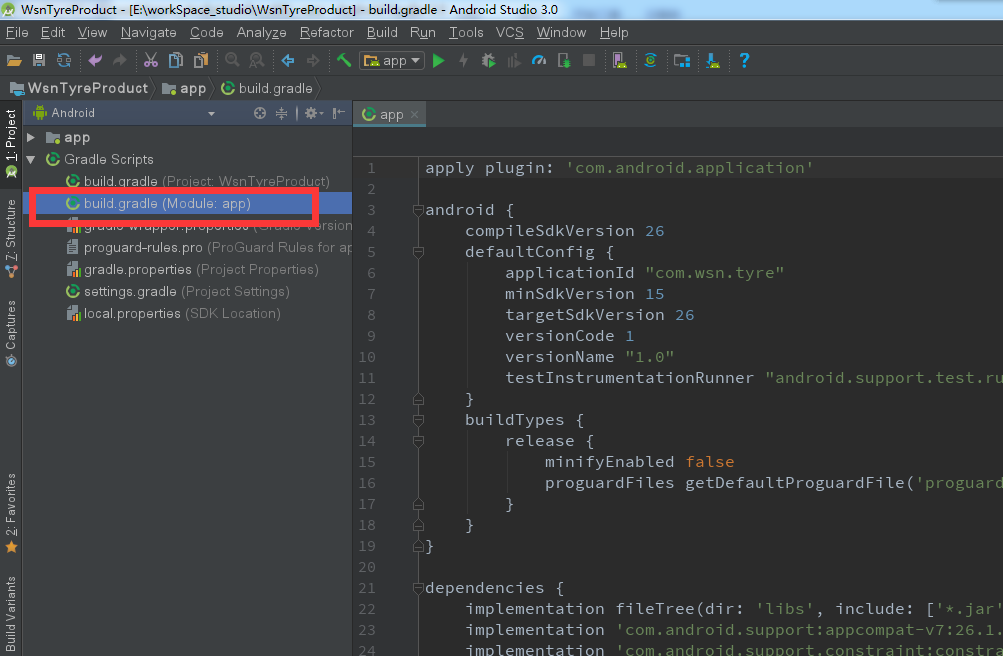
# 如上图,build.gradle默认会完成项目基本配置(dependencies默认如下)。
implementation fileTree(include: ['*.jar'], dir: 'libs')
implementation 'androidx.constraintlayout:constraintlayout:1.1.3'
testImplementation 'junit:junit:4.12'
androidTestImplementation 'androidx.test.ext:junit:1.1.1'
androidTestImplementation 'androidx.test.espresso:espresso-core:3.1.0'
implementation 'androidx.appcompat:appcompat:1.0.0'
implementation 'com.google.android.material:material:1.0.0'
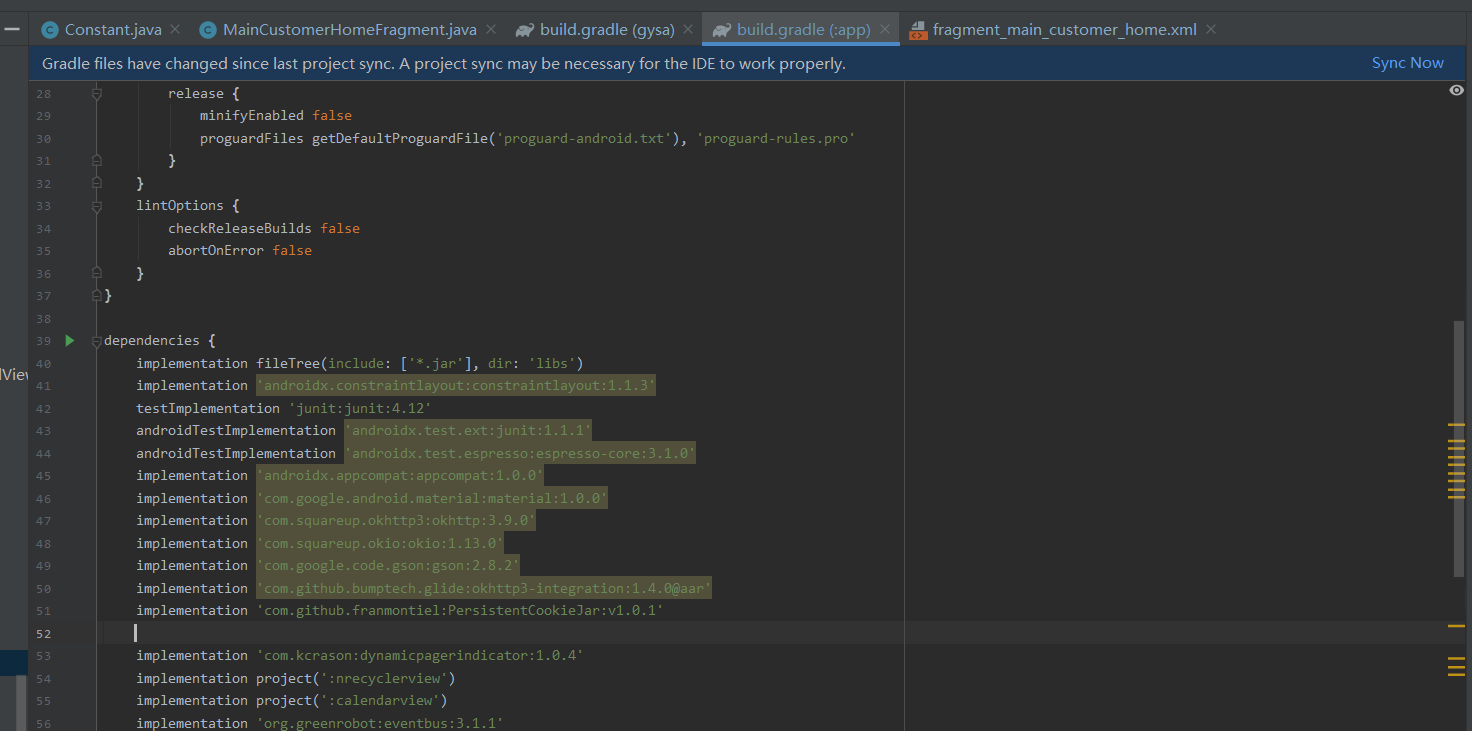
# 同理,为了完成前后台数据之间的交互,我们采用了okhttp3进行相关的网络请求,dependencies里需追加相关库文件(如下)。
implementation 'com.squareup.okhttp3:okhttp:3.9.0'
implementation 'com.squareup.okio:okio:1.13.0'
implementation 'com.google.code.gson:gson:2.8.2'
implementation 'com.github.bumptech.glide:okhttp3-integration:1.4.0@aar'
implementation 'com.github.franmontiel:PersistentCookieJar:v1.0.1'
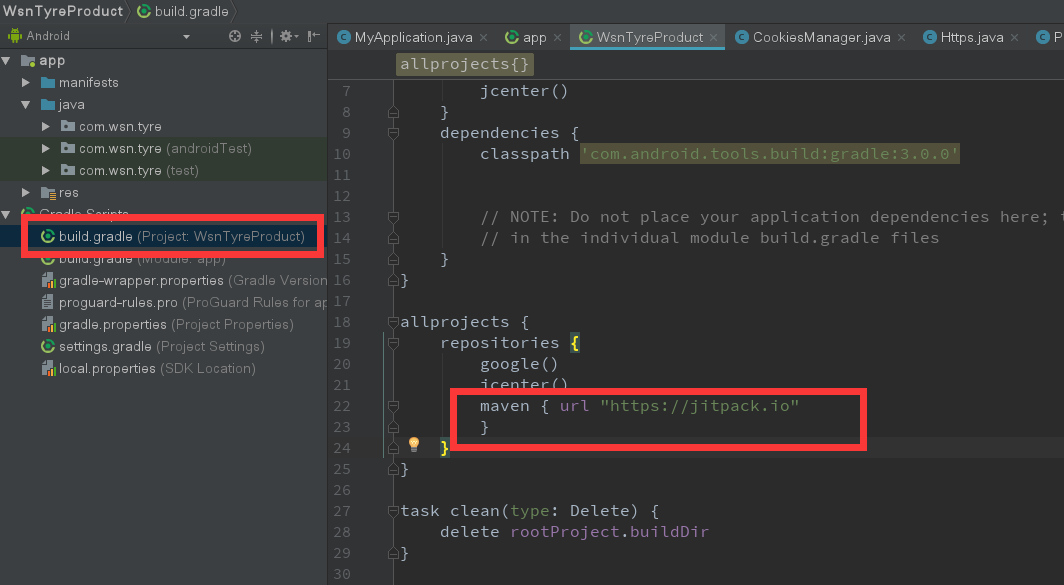
# project目录下build.gradle需添加maven,都添加后,点击Sync Now,相关包会下载到本地。
# 二,目录创建及说明
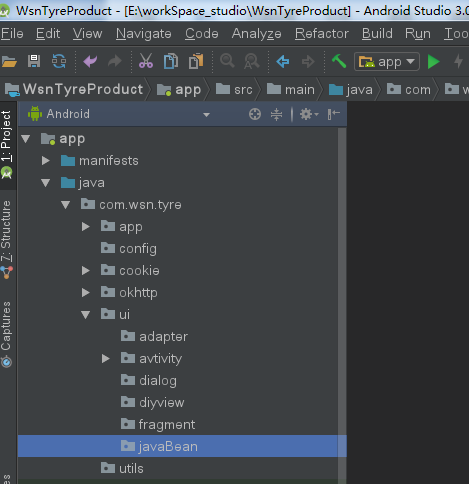
| app | app初始化文件目录 |
|---|---|
| config | 配置文件存放目录 |
| cookie | cookie持久化相关文件存放目录 |
| okhttp | 网络请求文件存放目录 |
| ui | activity/fragment等存放目录 |
| util | 工具类存放目录 |
# 三,初始配置及基类创建
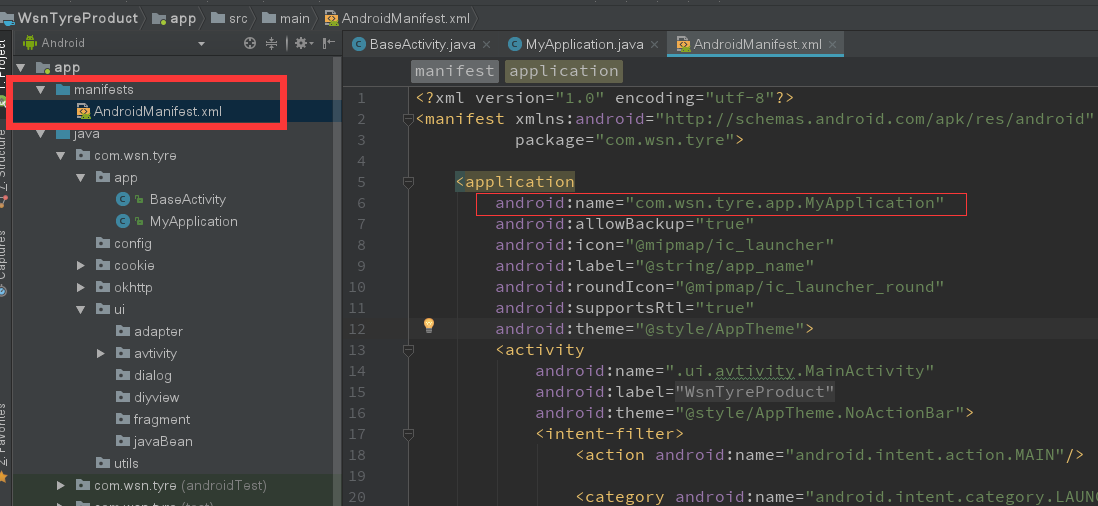
# 首先将系统默认创建的application修改成自己创建的文件,继承系统的application(方便后期扩展)。
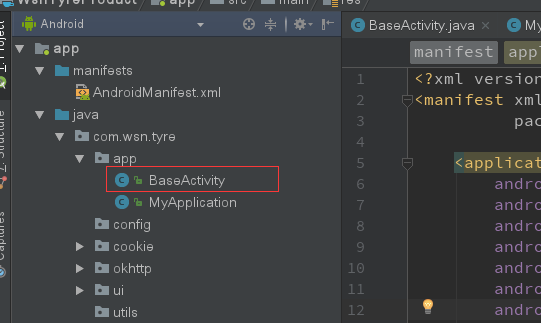
# 其次,定义基类activiy/fragment,用于后期继承,方便后期相关效果风格等统一。
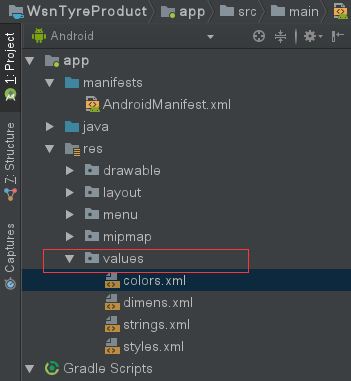
# 四,资源文件说明